User Guide
Query
from influxdb_client import InfluxDBClient, Point
from influxdb_client.client.write_api import SYNCHRONOUS

bucket = "my-bucket"

client = InfluxDBClient(url="http://localhost:8086", token="my-token", org="my-org")

write_api = client.write_api(write_options=SYNCHRONOUS)
query_api = client.query_api()

p = Point("my_measurement").tag("location", "Prague").field("temperature", 25.3)

write_api.write(bucket=bucket, record=p)

## using Table structure
tables = query_api.query('from(bucket:"my-bucket") |> range(start: -10m)')

for table in tables:
    print(table)
    for row in table.records:
        print (row.values)


## using csv library
csv_result = query_api.query_csv('from(bucket:"my-bucket") |> range(start: -10m)')
val_count = 0
for row in csv_result:
    for cell in row:
        val_count += 1
Write
The WriteApi supports synchronous, asynchronous and batching writes into InfluxDB 2.0. The data should be passed as a InfluxDB Line Protocol, Data Point or Observable stream.
:warning:
The
WriteApiin batching mode (default mode) is supposed to run as a singleton. To flush all your data you should wrap the execution usingwith client.write_api(...) as write_api:statement or callwrite_api.close()at the end of your script.
The default instance of WriteApi use batching.
The data could be written as
stringorbytesthat is formatted as a InfluxDB’s line protocolData Point structure
Dictionary style mapping with keys:
measurement,tags,fieldsandtimeor custom structureList of above items
A
batchingtype of write also supports anObservablethat produce one of an above item
You can find write examples at GitHub: influxdb-client-python/examples.
Batching
The batching is configurable by write_options:
Property |
Description |
Default Value |
|---|---|---|
batch_size |
the number of data point to collect in a batch |
|
flush_interval |
the number of milliseconds before the batch is written |
|
jitter_interval |
the number of milliseconds to increase the batch flush interval by a random amount |
|
retry_interval |
the number of milliseconds to retry first unsuccessful write. The next retry delay is computed using exponential random backoff. The retry interval is used when the InfluxDB server does not specify “Retry-After” header. |
|
max_retry_time |
maximum total retry timeout in milliseconds. |
|
max_retries |
the number of max retries when write fails |
|
max_retry_delay |
the maximum delay between each retry attempt in milliseconds |
|
max_close_wait |
the maximum amount of time to wait for batches to flush when |
|
exponential_base |
the base for the exponential retry delay, the next delay is computed using random exponential backoff as a random value within the interval |
|
from datetime import datetime, timedelta, timezone

import pandas as pd
import reactivex as rx
from reactivex import operators as ops

from influxdb_client import InfluxDBClient, Point, WriteOptions

with InfluxDBClient(url="http://localhost:8086", token="my-token", org="my-org") as _client:

    with _client.write_api(write_options=WriteOptions(batch_size=500,
                                                      flush_interval=10_000,
                                                      jitter_interval=2_000,
                                                      retry_interval=5_000,
                                                      max_retries=5,
                                                      max_retry_delay=30_000,
                                                      max_close_wait=300_000,
                                                      exponential_base=2)) as _write_client:

        """
        Write Line Protocol formatted as string
        """
        _write_client.write("my-bucket", "my-org", "h2o_feet,location=coyote_creek water_level=1.0 1")
        _write_client.write("my-bucket", "my-org", ["h2o_feet,location=coyote_creek water_level=2.0 2",
                                                    "h2o_feet,location=coyote_creek water_level=3.0 3"])

        """
        Write Line Protocol formatted as byte array
        """
        _write_client.write("my-bucket", "my-org", "h2o_feet,location=coyote_creek water_level=1.0 1".encode())
        _write_client.write("my-bucket", "my-org", ["h2o_feet,location=coyote_creek water_level=2.0 2".encode(),
                                                    "h2o_feet,location=coyote_creek water_level=3.0 3".encode()])

        """
        Write Dictionary-style object
        """
        _write_client.write("my-bucket", "my-org", {"measurement": "h2o_feet", "tags": {"location": "coyote_creek"},
                                                    "fields": {"water_level": 1.0}, "time": 1})
        _write_client.write("my-bucket", "my-org", [{"measurement": "h2o_feet", "tags": {"location": "coyote_creek"},
                                                     "fields": {"water_level": 2.0}, "time": 2},
                                                    {"measurement": "h2o_feet", "tags": {"location": "coyote_creek"},
                                                     "fields": {"water_level": 3.0}, "time": 3}])

        """
        Write Data Point
        """
        _write_client.write("my-bucket", "my-org",
                            Point("h2o_feet").tag("location", "coyote_creek").field("water_level", 4.0).time(4))
        _write_client.write("my-bucket", "my-org",
                            [Point("h2o_feet").tag("location", "coyote_creek").field("water_level", 5.0).time(5),
                             Point("h2o_feet").tag("location", "coyote_creek").field("water_level", 6.0).time(6)])

        """
        Write Observable stream
        """
        _data = rx \
            .range(7, 11) \
            .pipe(ops.map(lambda i: "h2o_feet,location=coyote_creek water_level={0}.0 {0}".format(i)))

        _write_client.write("my-bucket", "my-org", _data)

        """
        Write Pandas DataFrame
        """
        _now = datetime.now(tz=timezone.utc)
        _data_frame = pd.DataFrame(data=[["coyote_creek", 1.0], ["coyote_creek", 2.0]],
                                   index=[_now, _now + timedelta(hours=1)],
                                   columns=["location", "water_level"])

        _write_client.write("my-bucket", "my-org", record=_data_frame, data_frame_measurement_name='h2o_feet',
                            data_frame_tag_columns=['location'])
Synchronous client
Data are writes in a synchronous HTTP request.
from influxdb_client import InfluxDBClient, Point
from influxdb_client .client.write_api import SYNCHRONOUS

client = InfluxDBClient(url="http://localhost:8086", token="my-token", org="my-org")
write_api = client.write_api(write_options=SYNCHRONOUS)

_point1 = Point("my_measurement").tag("location", "Prague").field("temperature", 25.3)
_point2 = Point("my_measurement").tag("location", "New York").field("temperature", 24.3)

write_api.write(bucket="my-bucket", record=[_point1, _point2])

client.close()
Delete data
The delete_api.py supports deletes points from an InfluxDB bucket.
from influxdb_client import InfluxDBClient

client = InfluxDBClient(url="http://localhost:8086", token="my-token")

delete_api = client.delete_api()

"""
Delete Data
"""
start = "1970-01-01T00:00:00Z"
stop = "2021-02-01T00:00:00Z"
delete_api.delete(start, stop, '_measurement="my_measurement"', bucket='my-bucket', org='my-org')

"""
Close client
"""
client.close()
Pandas DataFrame
:warning:
For DataFrame querying you should install Pandas dependency via
pip install 'influxdb-client[extra]'.
:warning:
Note that if a query returns more then one table than the client generates a
DataFramefor each of them.
The client is able to retrieve data in Pandas DataFrame format thought query_data_frame:
from influxdb_client import InfluxDBClient, Point, Dialect
from influxdb_client.client.write_api import SYNCHRONOUS

client = InfluxDBClient(url="http://localhost:8086", token="my-token", org="my-org")

write_api = client.write_api(write_options=SYNCHRONOUS)
query_api = client.query_api()

"""
Prepare data
"""

_point1 = Point("my_measurement").tag("location", "Prague").field("temperature", 25.3)
_point2 = Point("my_measurement").tag("location", "New York").field("temperature", 24.3)

write_api.write(bucket="my-bucket", record=[_point1, _point2])

"""
Query: using Pandas DataFrame
"""
data_frame = query_api.query_data_frame('from(bucket:"my-bucket") '
                                        '|> range(start: -10m) '
                                        '|> pivot(rowKey:["_time"], columnKey: ["_field"], valueColumn: "_value") '
                                        '|> keep(columns: ["location", "temperature"])')
print(data_frame.to_string())

"""
Close client
"""
client.close()
Output:
result table  location  temperature
0  _result     0  New York         24.3
1  _result     1    Prague         25.3
How to use Asyncio
Starting from version 1.27.0 for Python 3.7+ the influxdb-client package supports async/await based on asyncio, aiohttp and aiocsv.
You can install aiohttp and aiocsv directly:
$ python -m pip install influxdb-client aiohttp aiocsv
or use the [async] extra:
$ python -m pip install influxdb-client[async]
:warning:
The
InfluxDBClientAsyncshould be initialised insideasync coroutineotherwise there can be unexpected behaviour. For more info see: Why is creating a ClientSession outside an event loop dangerous?.
Async APIs
All async APIs are available via influxdb_client.client.influxdb_client_async.InfluxDBClientAsync. The async version of the client supports following asynchronous APIs:
influxdb_client.client.write_api_async.WriteApiAsyncinfluxdb_client.client.query_api_async.QueryApiAsyncinfluxdb_client.client.delete_api_async.DeleteApiAsyncManagement services into
influxdb_client.servicesupports async operation
and also check to readiness of the InfluxDB via /ping endpoint:
The InfluxDBClientAsync constructor accepts a number of configuration properties. Most useful among these are:
connection_pool_maxsize- The total number of simultaneous connections. Defaults tomultiprocessing.cpu_count() * 5.enable_gzip- enable gzip compression duringwriteandquerycalls. Defaults tofalse.proxy- URL of an HTTP proxy to be used.timeout- The maximum number of milliseconds for handling HTTP requests from initial handshake to handling response data. This is passed directly to the underlying transport library. If large amounts of data are anticipated, for example fromquery_api.query_stream(...), this should be increased to avoidTimeoutErrororCancelledError. Defaults to 10_000 ms.
import asyncio

from influxdb_client.client.influxdb_client_async import InfluxDBClientAsync


async def main():
    async with InfluxDBClientAsync(url="http://localhost:8086", token="my-token", org="my-org") as client:
        ready = await client.ping()
        print(f"InfluxDB: {ready}")


if __name__ == "__main__":
    asyncio.run(main())
Async Write API
The influxdb_client.client.write_api_async.WriteApiAsync supports ingesting data as:
stringorbytesthat is formatted as a InfluxDB’s line protocolData Point structure
Dictionary style mapping with keys:
measurement,tags,fieldsandtimeor custom structureList of above items
import asyncio

from influxdb_client import Point
from influxdb_client.client.influxdb_client_async import InfluxDBClientAsync


async def main():
    async with InfluxDBClientAsync(url="http://localhost:8086", token="my-token", org="my-org") as client:

        write_api = client.write_api()

        _point1 = Point("async_m").tag("location", "Prague").field("temperature", 25.3)
        _point2 = Point("async_m").tag("location", "New York").field("temperature", 24.3)

        successfully = await write_api.write(bucket="my-bucket", record=[_point1, _point2])

        print(f" > successfully: {successfully}")


if __name__ == "__main__":
    asyncio.run(main())
Async Query API
The influxdb_client.client.query_api_async.QueryApiAsync supports retrieve data as:
List of
influxdb_client.client.flux_table.FluxTableStream of
influxdb_client.client.flux_table.FluxRecordviatyping.AsyncGeneratorStream of Pandas DataFrame via
typing.AsyncGeneratorRaw
stroutput
import asyncio

from influxdb_client.client.influxdb_client_async import InfluxDBClientAsync


async def main():
    async with InfluxDBClientAsync(url="http://localhost:8086", token="my-token", org="my-org") as client:
        # Stream of FluxRecords
        query_api = client.query_api()
        records = await query_api.query_stream('from(bucket:"my-bucket") '
                                               '|> range(start: -10m) '
                                               '|> filter(fn: (r) => r["_measurement"] == "async_m")')
        async for record in records:
            print(record)


if __name__ == "__main__":
    asyncio.run(main())
Async Delete API
import asyncio
from datetime import datetime

from influxdb_client.client.influxdb_client_async import InfluxDBClientAsync


async def main():
    async with InfluxDBClientAsync(url="http://localhost:8086", token="my-token", org="my-org") as client:
        start = datetime.fromtimestamp(0)
        stop = datetime.now()
        # Delete data with location = 'Prague'
        successfully = await client.delete_api().delete(start=start, stop=stop, bucket="my-bucket",
                                                        predicate="location = \"Prague\"")
        print(f" > successfully: {successfully}")


if __name__ == "__main__":
    asyncio.run(main())
Management API
import asyncio

from influxdb_client import OrganizationsService
from influxdb_client.client.influxdb_client_async import InfluxDBClientAsync


async def main():
    async with InfluxDBClientAsync(url='http://localhost:8086', token='my-token', org='my-org') as client:
        # Initialize async OrganizationsService
        organizations_service = OrganizationsService(api_client=client.api_client)

        # Find organization with name 'my-org'
        organizations = await organizations_service.get_orgs(org='my-org')
        for organization in organizations.orgs:
            print(f'name: {organization.name}, id: {organization.id}')


if __name__ == "__main__":
    asyncio.run(main())
Proxy and redirects
You can configure the client to tunnel requests through an HTTP proxy. The following proxy options are supported:
proxy- Set this to configure the http proxy to be used, ex.http://localhost:3128proxy_headers- A dictionary containing headers that will be sent to the proxy. Could be used for proxy authentication.
from influxdb_client.client.influxdb_client_async import InfluxDBClientAsync


async with InfluxDBClientAsync(url="http://localhost:8086",
                               token="my-token",
                               org="my-org",
                               proxy="http://localhost:3128") as client:
If your proxy notify the client with permanent redirect (HTTP 301) to different host.
The client removes Authorization header, because otherwise the contents of Authorization is sent to third parties which is a security vulnerability.
Client automatically follows HTTP redirects. The default redirect policy is to follow up to 10 consecutive requests.
The redirects can be configured via:
allow_redirects- If set toFalse, do not follow HTTP redirects.Trueby default.max_redirects- Maximum number of HTTP redirects to follow.10by default.
Gzip support
InfluxDBClient does not enable gzip compression for http requests by default. If you want to enable gzip to reduce transfer data’s size, you can call:
from influxdb_client import InfluxDBClient

_db_client = InfluxDBClient(url="http://localhost:8086", token="my-token", org="my-org", enable_gzip=True)
Proxy configuration
You can configure the client to tunnel requests through an HTTP proxy. The following proxy options are supported:
proxy- Set this to configure the http proxy to be used, ex.http://localhost:3128proxy_headers- A dictionary containing headers that will be sent to the proxy. Could be used for proxy authentication.
from influxdb_client import InfluxDBClient

with InfluxDBClient(url="http://localhost:8086",
                    token="my-token",
                    org="my-org",
                    proxy="http://localhost:3128") as client:
If your proxy notify the client with permanent redirect (HTTP 301) to different host. The client removes Authorization header, because otherwise the contents of Authorization is sent to third parties which is a security vulnerability.
You can change this behaviour by:
from urllib3 import Retry
Retry.DEFAULT_REMOVE_HEADERS_ON_REDIRECT = frozenset()
Retry.DEFAULT.remove_headers_on_redirect = Retry.DEFAULT_REMOVE_HEADERS_ON_REDIRECT
Authentication
InfluxDBClient supports three options how to authorize a connection:
Token
Username & Password
HTTP Basic
Token
Use the token to authenticate to the InfluxDB API. In your API requests, an Authorization header will be sent. The header value, provide the word Token followed by a space and an InfluxDB API token. The word token is case-sensitive.
from influxdb_client import InfluxDBClient

with InfluxDBClient(url="http://localhost:8086", token="my-token") as client
:warning:
Note that this is a preferred way how to authenticate to InfluxDB API.
Username & Password
Authenticates via username and password credentials. If successful, creates a new session for the user.
from influxdb_client import InfluxDBClient

with InfluxDBClient(url="http://localhost:8086", username="my-user", password="my-password") as client
:warning:
The
username/passwordauth is based on the HTTP “Basic” authentication. The authorization expires when the time-to-live (TTL) (default 60 minutes) is reached and client producesunauthorized exception.
HTTP Basic
Use this to enable basic authentication when talking to a InfluxDB 1.8.x that does not use auth-enabled but is protected by a reverse proxy with basic authentication.
from influxdb_client import InfluxDBClient

with InfluxDBClient(url="http://localhost:8086", auth_basic=True, token="my-proxy-secret") as client
:warning:
Don’t use this when directly talking to InfluxDB 2.
Nanosecond precision
The Python’s datetime doesn’t support precision with nanoseconds so the library during writes and queries ignores everything after microseconds.
If you would like to use datetime with nanosecond precision you should use pandas.Timestamp that is replacement for python datetime.datetime object, and also you should set a proper DateTimeHelper to the client.
sources - nanosecond_precision.py
from influxdb_client import Point, InfluxDBClient
from influxdb_client.client.util.date_utils_pandas import PandasDateTimeHelper
from influxdb_client.client.write_api import SYNCHRONOUS

"""
Set PandasDate helper which supports nanoseconds.
"""
import influxdb_client.client.util.date_utils as date_utils

date_utils.date_helper = PandasDateTimeHelper()

"""
Prepare client.
"""
client = InfluxDBClient(url="http://localhost:8086", token="my-token", org="my-org")

write_api = client.write_api(write_options=SYNCHRONOUS)
query_api = client.query_api()

"""
Prepare data
"""

point = Point("h2o_feet") \
    .field("water_level", 10) \
    .tag("location", "pacific") \
    .time('1996-02-25T21:20:00.001001231Z')

print(f'Time serialized with nanosecond precision: {point.to_line_protocol()}')
print()

write_api.write(bucket="my-bucket", record=point)

"""
Query: using Stream
"""
query = '''
from(bucket:"my-bucket")
        |> range(start: 0, stop: now())
        |> filter(fn: (r) => r._measurement == "h2o_feet")
'''
records = query_api.query_stream(query)

for record in records:
    print(f'Temperature in {record["location"]} is {record["_value"]} at time: {record["_time"]}')

"""
Close client
"""
client.close()
Handling Errors
Errors happen, and it’s important that your code is prepared for them. All client related exceptions are delivered from InfluxDBError.
If the exception cannot be recovered in the client it is returned to the application. These exceptions are left for the developer to handle.
Almost all APIs directly return unrecoverable exceptions to be handled this way:
from influxdb_client import InfluxDBClient
from influxdb_client.client.exceptions import InfluxDBError
from influxdb_client.client.write_api import SYNCHRONOUS

with InfluxDBClient(url="http://localhost:8086", token="my-token", org="my-org") as client:
    try:
        client.write_api(write_options=SYNCHRONOUS).write("my-bucket", record="mem,tag=a value=86")
    except InfluxDBError as e:
        if e.response.status == 401:
            raise Exception(f"Insufficient write permissions to 'my-bucket'.") from e
        raise
The only exception is batching WriteAPI (for more info see Batching) where you need to register custom callbacks to handle batch events.
This is because this API runs in the background in a separate thread and isn’t possible to directly return underlying exceptions.
from influxdb_client import InfluxDBClient
from influxdb_client.client.exceptions import InfluxDBError


class BatchingCallback(object):

    def success(self, conf: (str, str, str), data: str):
        print(f"Written batch: {conf}, data: {data}")

    def error(self, conf: (str, str, str), data: str, exception: InfluxDBError):
        print(f"Cannot write batch: {conf}, data: {data} due: {exception}")

    def retry(self, conf: (str, str, str), data: str, exception: InfluxDBError):
        print(f"Retryable error occurs for batch: {conf}, data: {data} retry: {exception}")


with InfluxDBClient(url="http://localhost:8086", token="my-token", org="my-org") as client:
    callback = BatchingCallback()
    with client.write_api(success_callback=callback.success,
                          error_callback=callback.error,
                          retry_callback=callback.retry) as write_api:
        pass
HTTP Retry Strategy
By default, the client uses a retry strategy only for batching writes (for more info see Batching).
For other HTTP requests there is no one retry strategy, but it could be configured by retries parameter of InfluxDBClient.
For more info about how configure HTTP retry see details in urllib3 documentation.
from urllib3 import Retry

from influxdb_client import InfluxDBClient

retries = Retry(connect=5, read=2, redirect=5)
client = InfluxDBClient(url="http://localhost:8086", token="my-token", org="my-org", retries=retries)
Logging
The client uses Python’s logging facility for logging the library activity. The following logger categories are exposed:
influxdb_client.client.influxdb_clientinfluxdb_client.client.influxdb_client_asyncinfluxdb_client.client.write_apiinfluxdb_client.client.write_api_asyncinfluxdb_client.client.write.retryinfluxdb_client.client.write.dataframe_serializerinfluxdb_client.client.util.multiprocessing_helperinfluxdb_client.client.httpinfluxdb_client.client.exceptions
The default logging level is warning without configured logger output. You can use the standard logger interface to change the log level and handler:
import logging
import sys

from influxdb_client import InfluxDBClient

with InfluxDBClient(url="http://localhost:8086", token="my-token", org="my-org") as client:
    for _, logger in client.conf.loggers.items():
        logger.setLevel(logging.DEBUG)
        logger.addHandler(logging.StreamHandler(sys.stdout))
Debugging
For debug purpose you can enable verbose logging of HTTP requests and set the debug level to all client’s logger categories by:
client = InfluxDBClient(url="http://localhost:8086", token="my-token", debug=True)
Both HTTP request headers and body will be logged to standard output.
Examples
How to efficiently import large dataset
The following example shows how to import dataset with a dozen megabytes. If you would like to import gigabytes of data then use our multiprocessing example: import_data_set_multiprocessing.py for use a full capability of your hardware.
sources - import_data_set.py
"""
Import VIX - CBOE Volatility Index - from "vix-daily.csv" file into InfluxDB 2.0

https://datahub.io/core/finance-vix#data
"""

from collections import OrderedDict
from csv import DictReader

import reactivex as rx
from reactivex import operators as ops

from influxdb_client import InfluxDBClient, Point, WriteOptions

def parse_row(row: OrderedDict):
    """Parse row of CSV file into Point with structure:

        financial-analysis,type=ily close=18.47,high=19.82,low=18.28,open=19.82 1198195200000000000

    CSV format:
        Date,VIX Open,VIX High,VIX Low,VIX Close\n
        2004-01-02,17.96,18.68,17.54,18.22\n
        2004-01-05,18.45,18.49,17.44,17.49\n
        2004-01-06,17.66,17.67,16.19,16.73\n
        2004-01-07,16.72,16.75,15.5,15.5\n
        2004-01-08,15.42,15.68,15.32,15.61\n
        2004-01-09,16.15,16.88,15.57,16.75\n
        ...

    :param row: the row of CSV file
    :return: Parsed csv row to [Point]
    """

    """
     For better performance is sometimes useful directly create a LineProtocol to avoid unnecessary escaping overhead:
     """
     # from datetime import timezone
     # import ciso8601
     # from influxdb_client.client.write.point import EPOCH
     #
     # time = (ciso8601.parse_datetime(row["Date"]).replace(tzinfo=timezone.utc) - EPOCH).total_seconds() * 1e9
     # return f"financial-analysis,type=vix-daily" \
     #        f" close={float(row['VIX Close'])},high={float(row['VIX High'])},low={float(row['VIX Low'])},open={float(row['VIX Open'])} " \
     #        f" {int(time)}"

    return Point("financial-analysis") \
        .tag("type", "vix-daily") \
        .field("open", float(row['VIX Open'])) \
        .field("high", float(row['VIX High'])) \
        .field("low", float(row['VIX Low'])) \
        .field("close", float(row['VIX Close'])) \
        .time(row['Date'])


"""
Converts vix-daily.csv into sequence of datad point
"""
data = rx \
    .from_iterable(DictReader(open('vix-daily.csv', 'r'))) \
    .pipe(ops.map(lambda row: parse_row(row)))

client = InfluxDBClient(url="http://localhost:8086", token="my-token", org="my-org", debug=True)

"""
Create client that writes data in batches with 50_000 items.
"""
write_api = client.write_api(write_options=WriteOptions(batch_size=50_000, flush_interval=10_000))

"""
Write data into InfluxDB
"""
write_api.write(bucket="my-bucket", record=data)
write_api.close()

"""
Querying max value of CBOE Volatility Index
"""
query = 'from(bucket:"my-bucket")' \
        ' |> range(start: 0, stop: now())' \
        ' |> filter(fn: (r) => r._measurement == "financial-analysis")' \
        ' |> max()'
result = client.query_api().query(query=query)

"""
Processing results
"""
print()
print("=== results ===")
print()
for table in result:
    for record in table.records:
        print('max {0:5} = {1}'.format(record.get_field(), record.get_value()))

"""
Close client
"""
client.close()
Efficiency write data from IOT sensor
sources - iot_sensor.py
"""
Efficiency write data from IOT sensor - write changed temperature every minute
"""
import atexit
import platform
from datetime import timedelta

import psutil as psutil
import reactivex as rx
from reactivex import operators as ops

from influxdb_client import InfluxDBClient, WriteApi, WriteOptions

def on_exit(db_client: InfluxDBClient, write_api: WriteApi):
    """Close clients after terminate a script.

    :param db_client: InfluxDB client
    :param write_api: WriteApi
    :return: nothing
    """
    write_api.close()
    db_client.close()


def sensor_temperature():
    """Read a CPU temperature. The [psutil] doesn't support MacOS so we use [sysctl].

    :return: actual CPU temperature
    """
    os_name = platform.system()
    if os_name == 'Darwin':
        from subprocess import check_output
        output = check_output(["sysctl", "machdep.xcpm.cpu_thermal_level"])
        import re
        return re.findall(r'\d+', str(output))[0]
    else:
        return psutil.sensors_temperatures()["coretemp"][0]


def line_protocol(temperature):
    """Create a InfluxDB line protocol with structure:

        iot_sensor,hostname=mine_sensor_12,type=temperature value=68

    :param temperature: the sensor temperature
    :return: Line protocol to write into InfluxDB
    """

    import socket
    return 'iot_sensor,hostname={},type=temperature value={}'.format(socket.gethostname(), temperature)


"""
Read temperature every minute; distinct_until_changed - produce only if temperature change
"""
data = rx\
    .interval(period=timedelta(seconds=60))\
    .pipe(ops.map(lambda t: sensor_temperature()),
          ops.distinct_until_changed(),
          ops.map(lambda temperature: line_protocol(temperature)))

_db_client = InfluxDBClient(url="http://localhost:8086", token="my-token", org="my-org", debug=True)

"""
Create client that writes data into InfluxDB
"""
_write_api = _db_client.write_api(write_options=WriteOptions(batch_size=1))
_write_api.write(bucket="my-bucket", record=data)


"""
Call after terminate a script
"""
atexit.register(on_exit, _db_client, _write_api)

input()
Connect to InfluxDB Cloud
The following example demonstrate the simplest way how to write and query date with the InfluxDB Cloud.
At first point you should create an authentication token as is described here.
After that you should configure properties: influx_cloud_url,influx_cloud_token, bucket and org in a influx_cloud.py example.
The last step is run a python script via: python3 influx_cloud.py.
sources - influx_cloud.py
"""
Connect to InfluxDB 2.0 - write data and query them
"""

from datetime import datetime, timezone

from influxdb_client import Point, InfluxDBClient
from influxdb_client.client.write_api import SYNCHRONOUS

"""
Configure credentials
"""
influx_cloud_url = 'https://us-west-2-1.aws.cloud2.influxdata.com'
influx_cloud_token = '...'
bucket = '...'
org = '...'

client = InfluxDBClient(url=influx_cloud_url, token=influx_cloud_token)
try:
    kind = 'temperature'
    host = 'host1'
    device = 'opt-123'

    """
    Write data by Point structure
    """
    point = Point(kind).tag('host', host).tag('device', device).field('value', 25.3).time(time=datetime.now(tz=timezone.utc))

    print(f'Writing to InfluxDB cloud: {point.to_line_protocol()} ...')

    write_api = client.write_api(write_options=SYNCHRONOUS)
    write_api.write(bucket=bucket, org=org, record=point)

    print()
    print('success')
    print()
    print()

    """
    Query written data
    """
    query = f'from(bucket: "{bucket}") |> range(start: -1d) |> filter(fn: (r) => r._measurement == "{kind}")'
    print(f'Querying from InfluxDB cloud: "{query}" ...')
    print()

    query_api = client.query_api()
    tables = query_api.query(query=query, org=org)

    for table in tables:
        for row in table.records:
            print(f'{row.values["_time"]}: host={row.values["host"]},device={row.values["device"]} '
                  f'{row.values["_value"]} °C')

    print()
    print('success')

except Exception as e:
    print(e)
finally:
    client.close()
How to use Jupyter + Pandas + InfluxDB 2
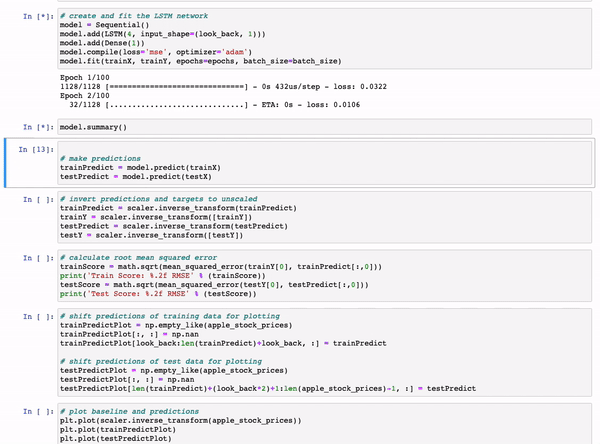
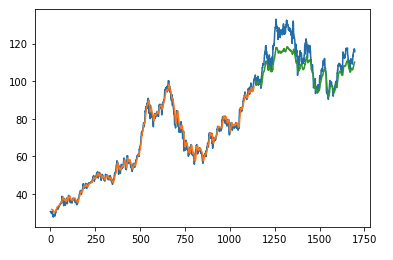
The first example shows how to use client capabilities to predict stock price via Keras, TensorFlow, sklearn:
The example is taken from Kaggle.
sources - stock-predictions.ipynb
Result:
The second example shows how to use client capabilities to realtime visualization via hvPlot, Streamz, RxPY:
sources - realtime-stream.ipynb
Other examples
You can find all examples at GitHub: influxdb-client-python/examples.